Deploy your operator
Set up the operator
The deployment of the operator is done using Docker Compose.
Prerequisites
To set up your operator, you need to have docker installed on your system. Please, be sure to have installed docker or follow the official Docker installation guide.
You also need to have two DNS entries pointing on the IP address of your server:
- One for
operator.your-domain-namepointing to the operator server. - One for
workspace.your-domain-namepointing to the workspace (operator's front) server.
Step 1: Set up operator configuration
The first step is to create the configuration files for the operator composed of the following files:
config.tomldescribing the operator configuration.docker-compose.ymldescribing the deployed architecture..envdescribing necessary environment variables used by thedocker-compose.ymlfile.Caddyfiledescribing the Caddy configuration (optional if not using Caddy).
You can either create the configuration files manually, or use the CLI.
- Using CLI
- Manually
Step 1: Install npm and the CLI
The first step is to install the node package manager (npm).
sudo apt update && sudo apt upgrade -y && sudo apt install npm && sudo npm i -g @cmts-dev/carmentis-cli
Step 2: Init the CLI
Before to proceed to the generation, you have to initialize the CLI, notably by importing the reference networks:
cmts networks import
You can list the loaded networks using the cmts networks list command.
Step 3: Generate the config
To generate the configuration of your operator, execute the following command and answer to the response interactively
(replace the $PATH_TO_GENERATE_CONFIG with the path where the configuration is generated):
cmts operator init-config --home $PATH_TO_GENERATE_CONFIG
Step 4: Run the operator
To run the operator, execute the following command (replace the $PATH_TO_GENERATE_CONFIG with the path where the configuration has been generated):
cd $PATH_TO_GENERATE_CONFIG && docker compose up -d
Create the operator configuration file config.toml: The operator requires the configuration file config.toml to
be present, otherwise the operator will not start.
In the configuration below, we have used an already deployed node https://ares.testnet.carmentis.io within the Carmentis network.
If you have followed one of the node deployment guide and have already deployed your own node, then feel-free
to replace the node URL with your own node address (e.g., http://node.your-domain-name:26667 or https://node.your-domain-name if
you have set up a TLS-enabled reverse-proxy like Caddy).
[operator]# The URL of the node the operator connects to.node_url = "https://apollo.testnet.carmentis.io"[operator.paths]# The home directory path used by the operator.home = "/operator"[operator.database.encryption]# Whether to allow automatic generation of encryption keys for the database.allow_encryption_key_generation = true[operator.database.postgresql]# Username for connecting to the PostgreSQL database.user = "user"# Password for the PostgreSQL user.password = "password"# Name of the PostgreSQL database.database = "database"# Host or URL of the PostgreSQL service.url = "operator-db"# Port used to connect to the PostgreSQL database.port = 5432
Create the Docker files: To deploy the operator, we use Docker Compose.
For security reasons, the operator must be accessed over TLS (HTTPS) in production.
In our architecture, we delegate the handling of TLS to Caddyserver.
However, you can also use another reverse proxy or even handle yourself TLS. We let you
with two different deployment options: with Caddy or without Caddy. When Caddy is used,
you have to create the Caddyfile file.
In addition to the docker-compose.yml file, you have to create the .env file.
The .env file contains the environment variables used by the docker-compose.yml file.
This file can be made optional by inlining the environment variables in the docker-compose.yml file.
The operator uses a PostgreSQL database. By default, the operator uses a Docker container to run a PostgreSQL database.
However, you can also use your own PostgreSQL database. In this case, you have to change the docker-compose.yml file
accordingly.
- With caddy
- Without caddy
To set up the operator with Caddy, you have to create the files below.
Create the docker-compose.yml file:
Loading...
Create the .env file: Be sure to correctly adapt the postgres variables according to your environment and to correctly update the domaine name.
Loading...
Create the Caddyfile file: Replace the domain names with yours.
Loading...
You only need to create the docker-compose.yml and .env files below:
Loading...
Loading...
Step 2: Launch your operator
To launch the operator, run the following command:
docker compose up -d
Once launched, the operator can be accessed at operator.your-domain-name in your browser.
In local development, you can access the operator at localhost:3000 by default.
To check that the operator is running, you can access the /api/public/hello endpoint.
Step 3: Create the first administrator
Once deployed, the (front of the) operator serves a registration page to create the first administrator.
For security reason, the registration requires an administrator creation token accessible either in the logs of the operator
or at the admin_token.txt file.
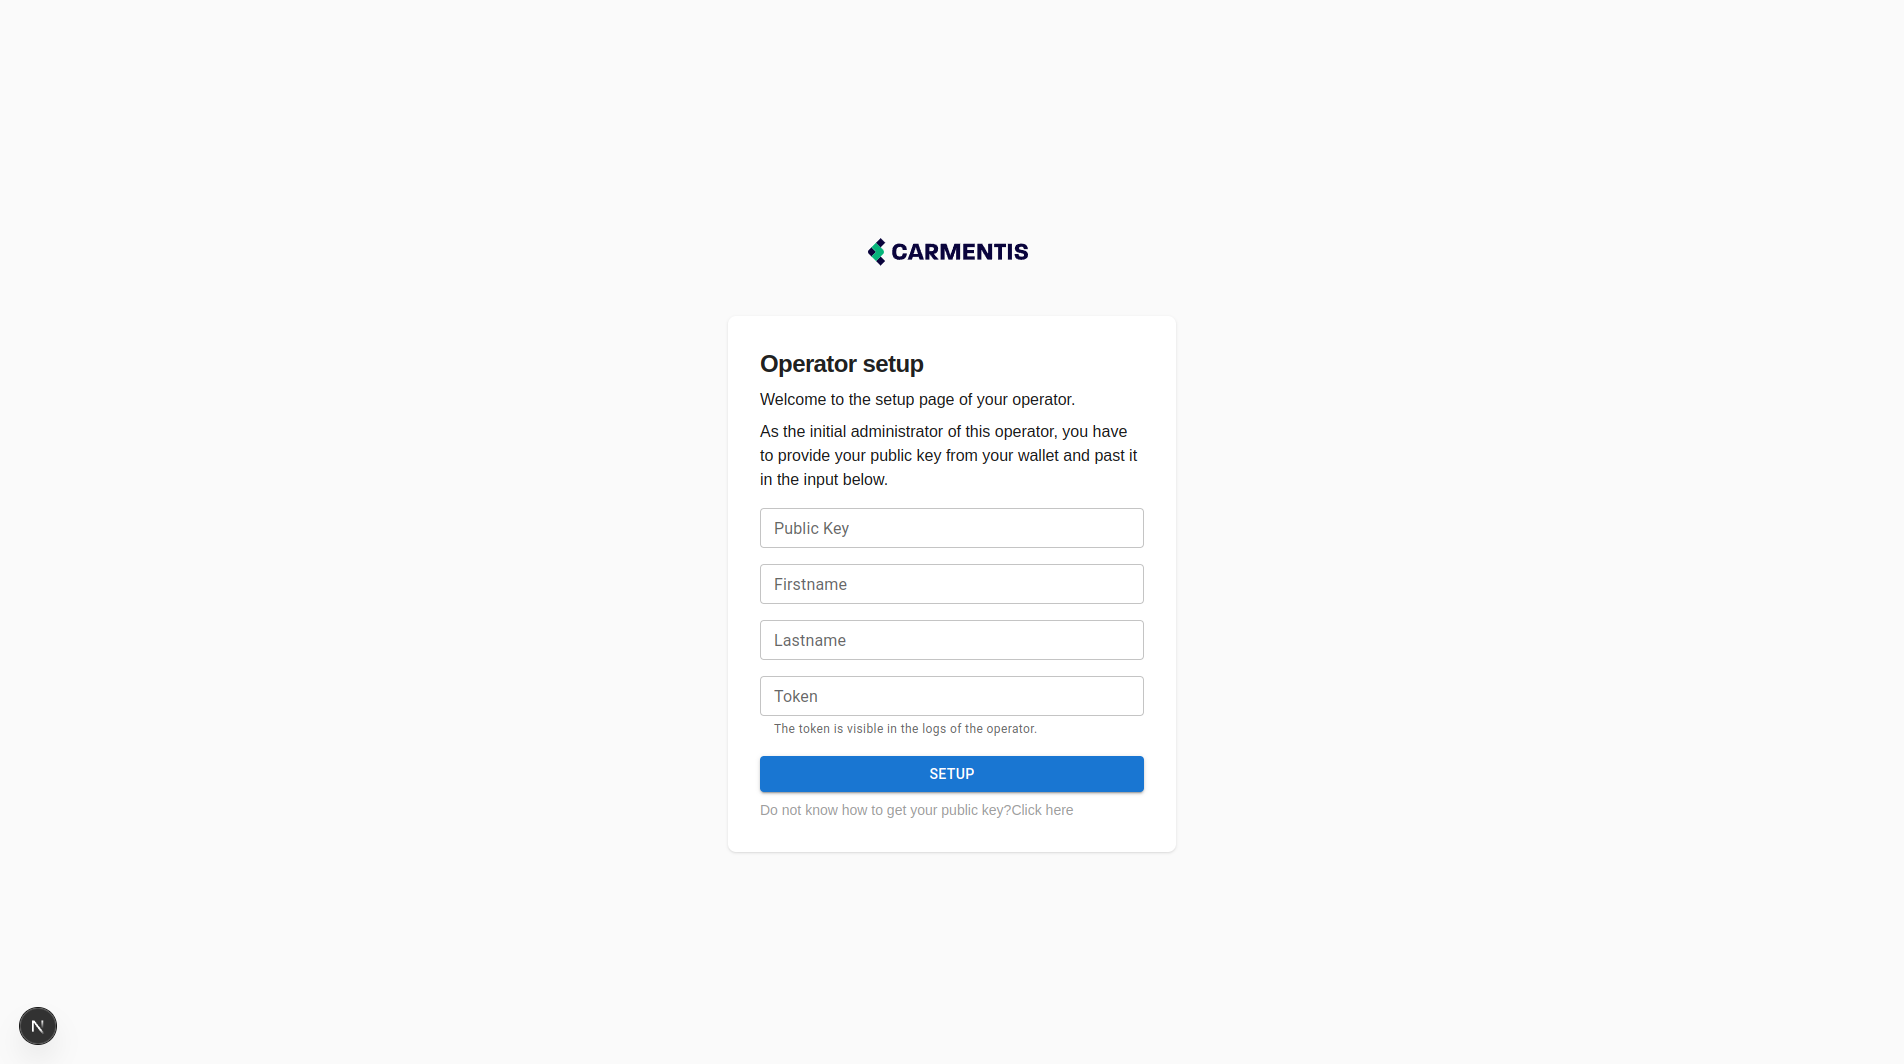
In the logs, the token should be displayed as below:
[Nest] 697594  - 18/04/2025 13:37:01     LOG [CryptoService] Below is shown the administrator creation token:
-------------------------------------------------------------
Administrator creation token location: [redacted]/admin-token.txt
Administrator creation token: E241C2E4BB9AFD31383D8802847FA69D4D40F7553FA0EF0D09EDE6222AE80E11
--------------------------------------------------------------
When using the CLI, you can obtain the first administration token using the following command:
cmts operator token --home $PATH_WHERE_CONFIG_HAS_BEEN_GENERATED
The registration also requires a public key, be sure to provide the public key of your wallet. Once an account associated with your public key is registered, you can now log in on the operator.
Step 4: Create your first organization
When launched for the first time, the operator displays a registration page to create your first organization. Click on the "Create organization" button to create your first organization.
When creating an organization, you have the possibility to provide a private seed, used to derive all the private keys. This seed is crucial and should be kept in a safe place.
Our recommendation is to generate a seed using the CLI as shown below:
$ cmts crypto gen seed
SEED{BPBgTSIjrTPsX76nyHG5iLAljKuVlLb92WbqkzmEc6N3SZjCp1O7wRl39ZZxU46zXIPDeQnftwXhzWYXjR4Ffw==}
Later on, if you need to boostrap your organization on a new operator, providing such a seed will allow the operator to identify your organization and recover all the published data from the chain. When no seed is provided, the operator generates a new one.
To create the token account for your organization, copy the public key of your organization and paste the key and number of desired tokens at the Exchange (testnet). Proceed to the payment. Once paid, tokens will be credited to your token account associated to the public key of your organization.
Once your token account has been created and associated with the public key of your organization, click on the publish button to declare your organization on-chain. The publication can take few seconds.
All the fields are required to publish an organization on-chain.
Step 5: Create your first application
Once your organization has been published, you can access the list of applications inside your organization. Click on the application creation button and provide a name for your application. Then, click on publish to publish your application.
The API key creation is done by accessing an application. Recall that an API key is always associated with an application. For this reason, we do not allow the creation of an API key outside the application page. To create an API key, provide a name for the key and an expiration date. Then, copy the created API key and paste the key on your environment to allow your server to contact the operator to perform an action.
Troubleshooting
Operator requests end in 404
In development, if the request ends in 404, ensure that the operator listens at the right port by checking the logs. Indeed, when starting the operator, if the specified port is not available, the operator attempts to listen on another free port.
The workspace shows an operator connection error
When the workspace cannot establish a connection with the operator, it displays an error message. The problem might come from several issues:
- The operator server is not running.
- The operator server does not listen to the correct port. It might come from an invalid port specification in the configuration, from a port conflict (the operator tries another free port), or an invalid docker port mapping.
- The
Caddyfileis invalid if you have provided twice the same URL for the two servers or an invalid URL. - The DNS configuration is not updated. You might have to update the DNS configuration to point to the correct IP address.
Docker not permitted (permission denired while trying to connect to the docker API at unix:///var/run/docker.sock)
In a fresh install of Docker, you might be unable to execute the docker run --rm hello-world command.
To solve this issue, we highly recommend you to follow the official Docker documentation for post-installations.
For more convinience, you can run the following commands but remember to check the Official Docker documentation:
sudo groupadd docker
sudo usermod -aG docker $USER
newgrp docker
docker run --rm hello-world
The docker-compose command is not found
Have you tried docker compose?
Most frequent actions
Create an organization
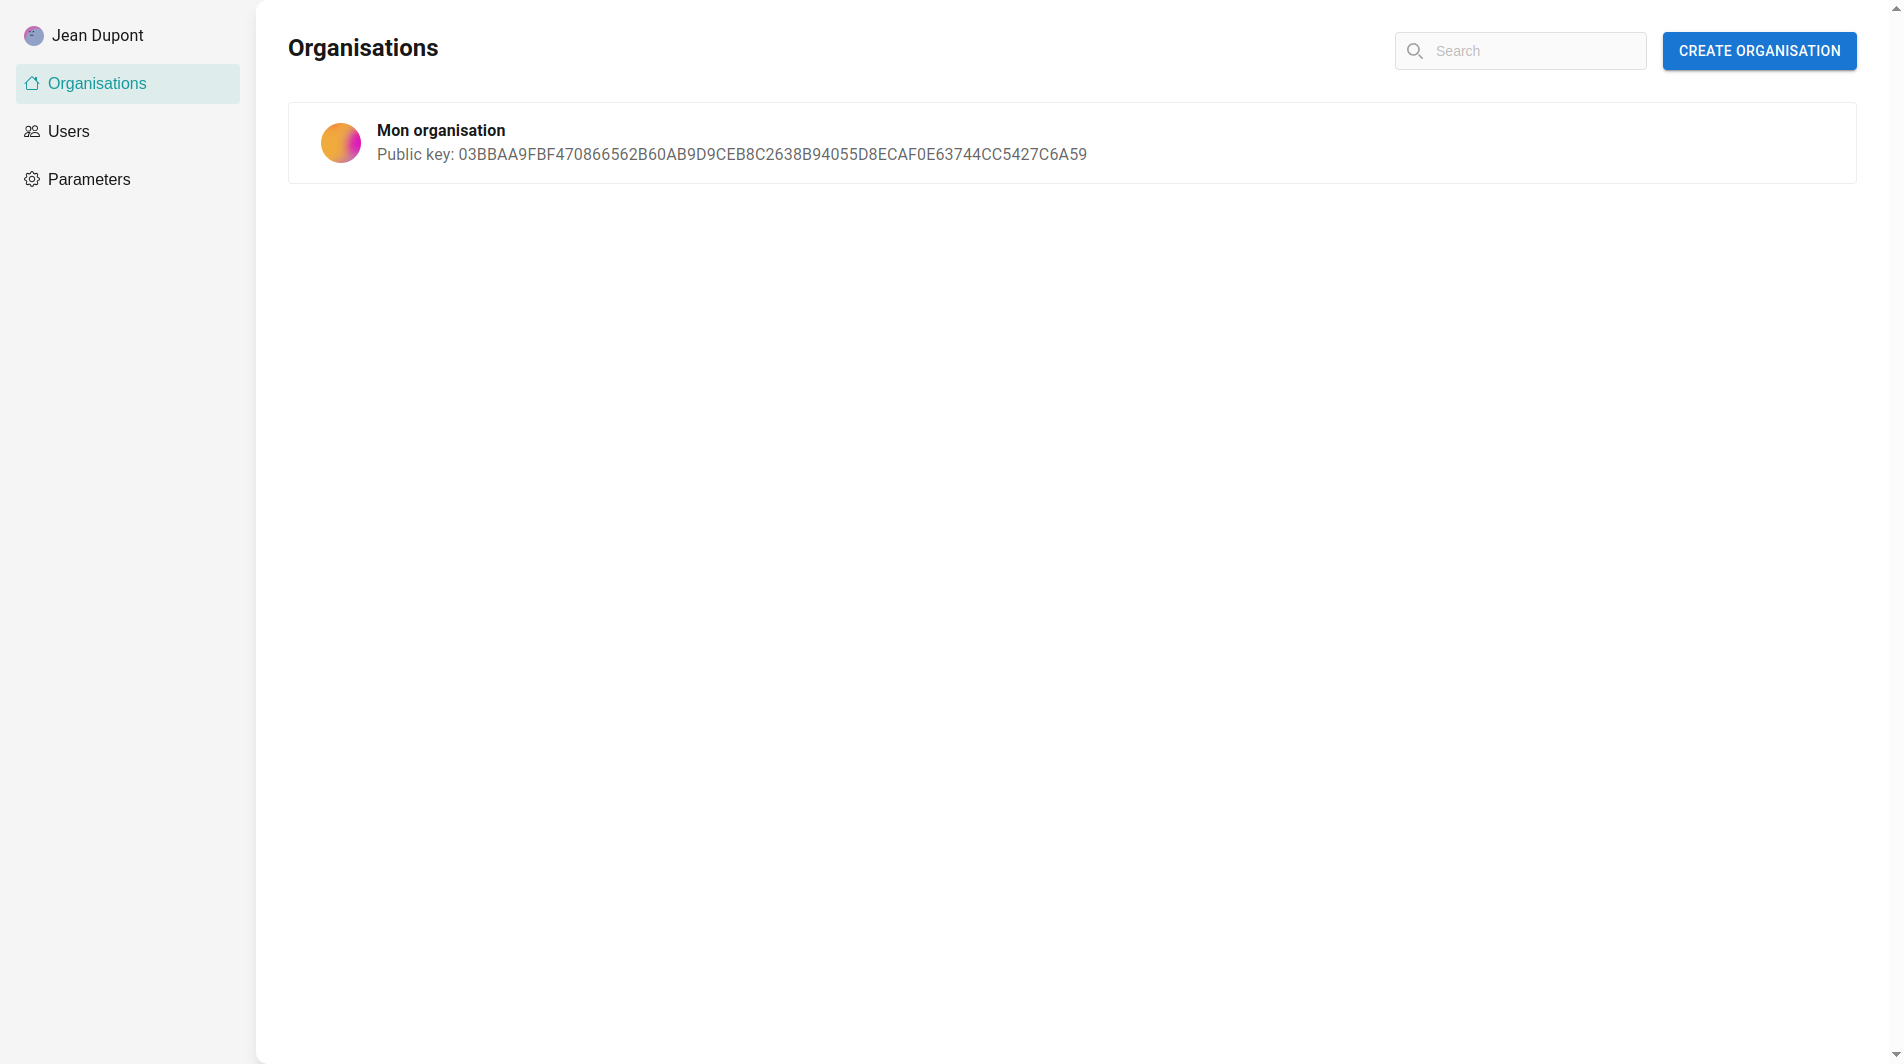
To create an organization, go to the "Organizations" section and click on "Create organization". Provide the name of your organization and click on "Create".
When creating an organization, you have the possibility to provide a private signature key. It is useful when you want to load an existing organization from the blockchain. When no private key is provided, the operator generates a new one.
Manage an organization
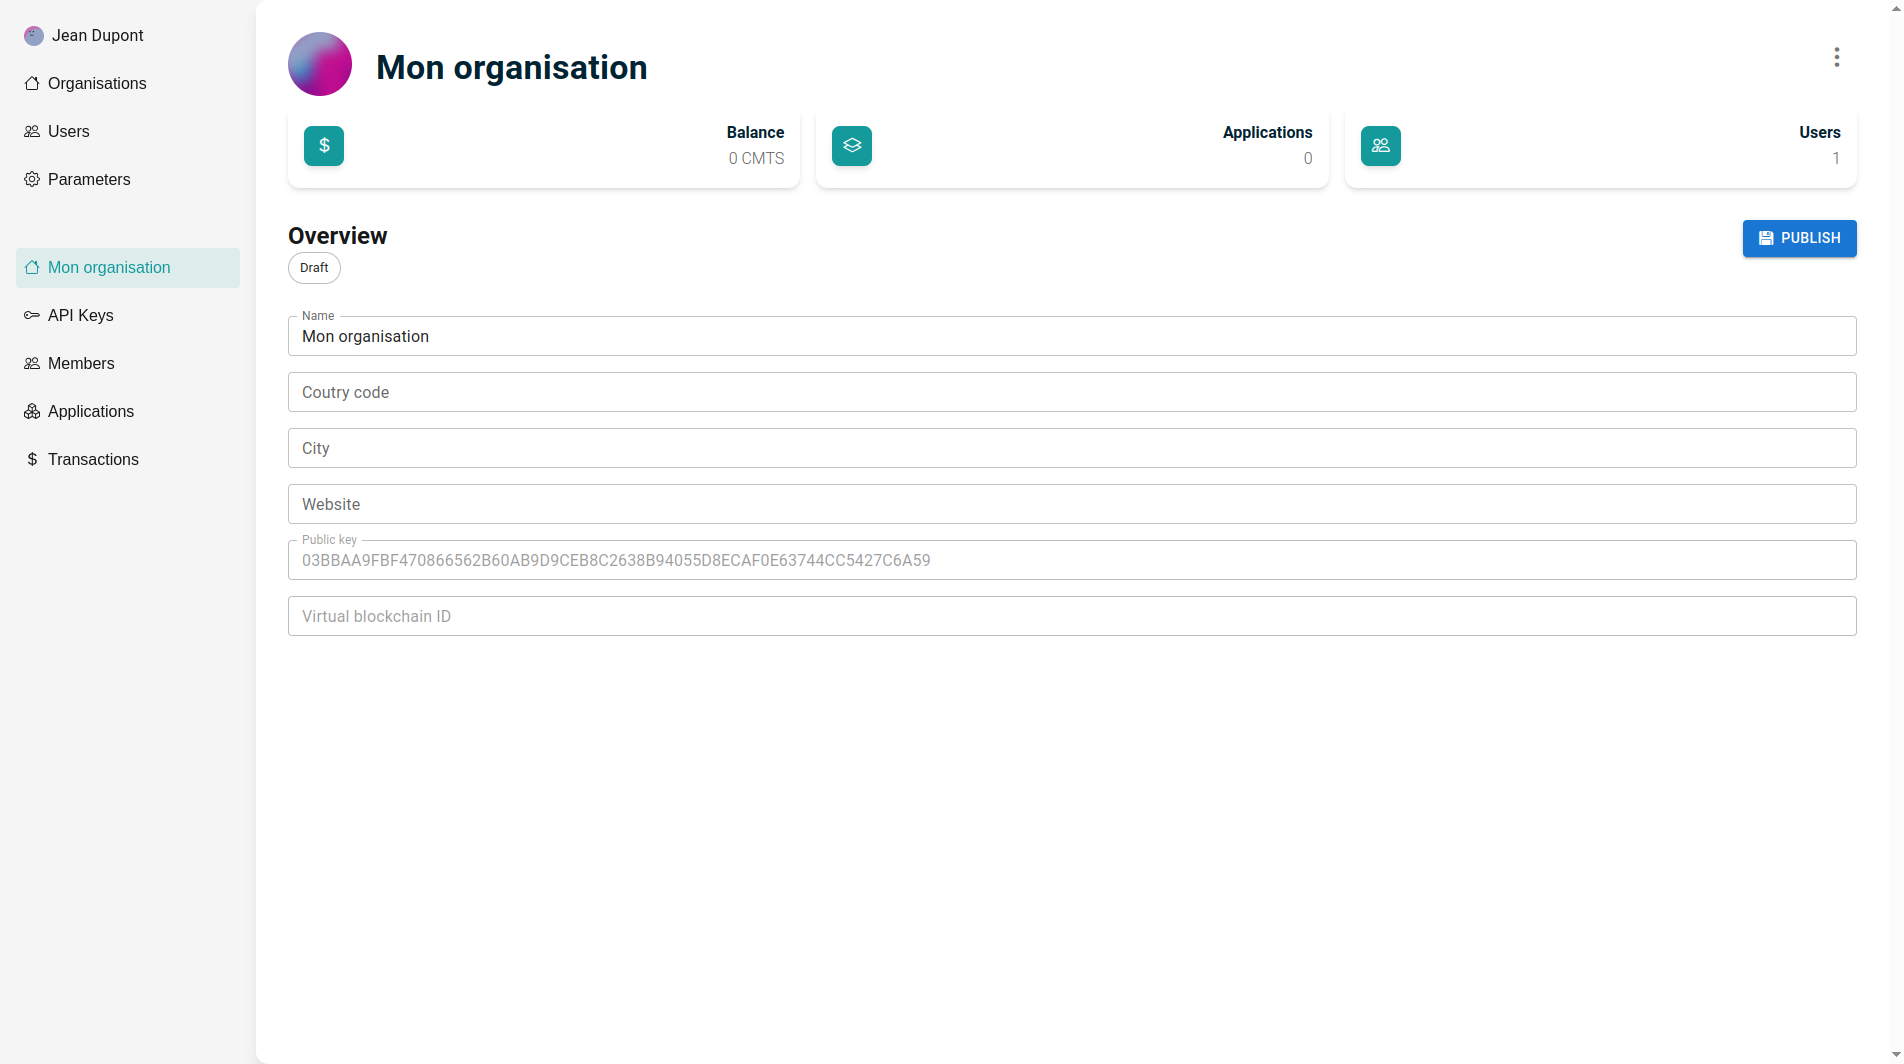
Edit an organization: To edit the organization name, city, country, and website, update the relevant fields with the new information. Once you've made the necessary changes, be sure to save your updates to ensure the new details are reflected in your operator.
Publish an organization: To publish your organization on chain, click on the "Publish" button. Once published, "Virtual blockchain ID" field will be filled. You can now see your organization on the explorer.
The country code and the city are required for the publication.
Create an application
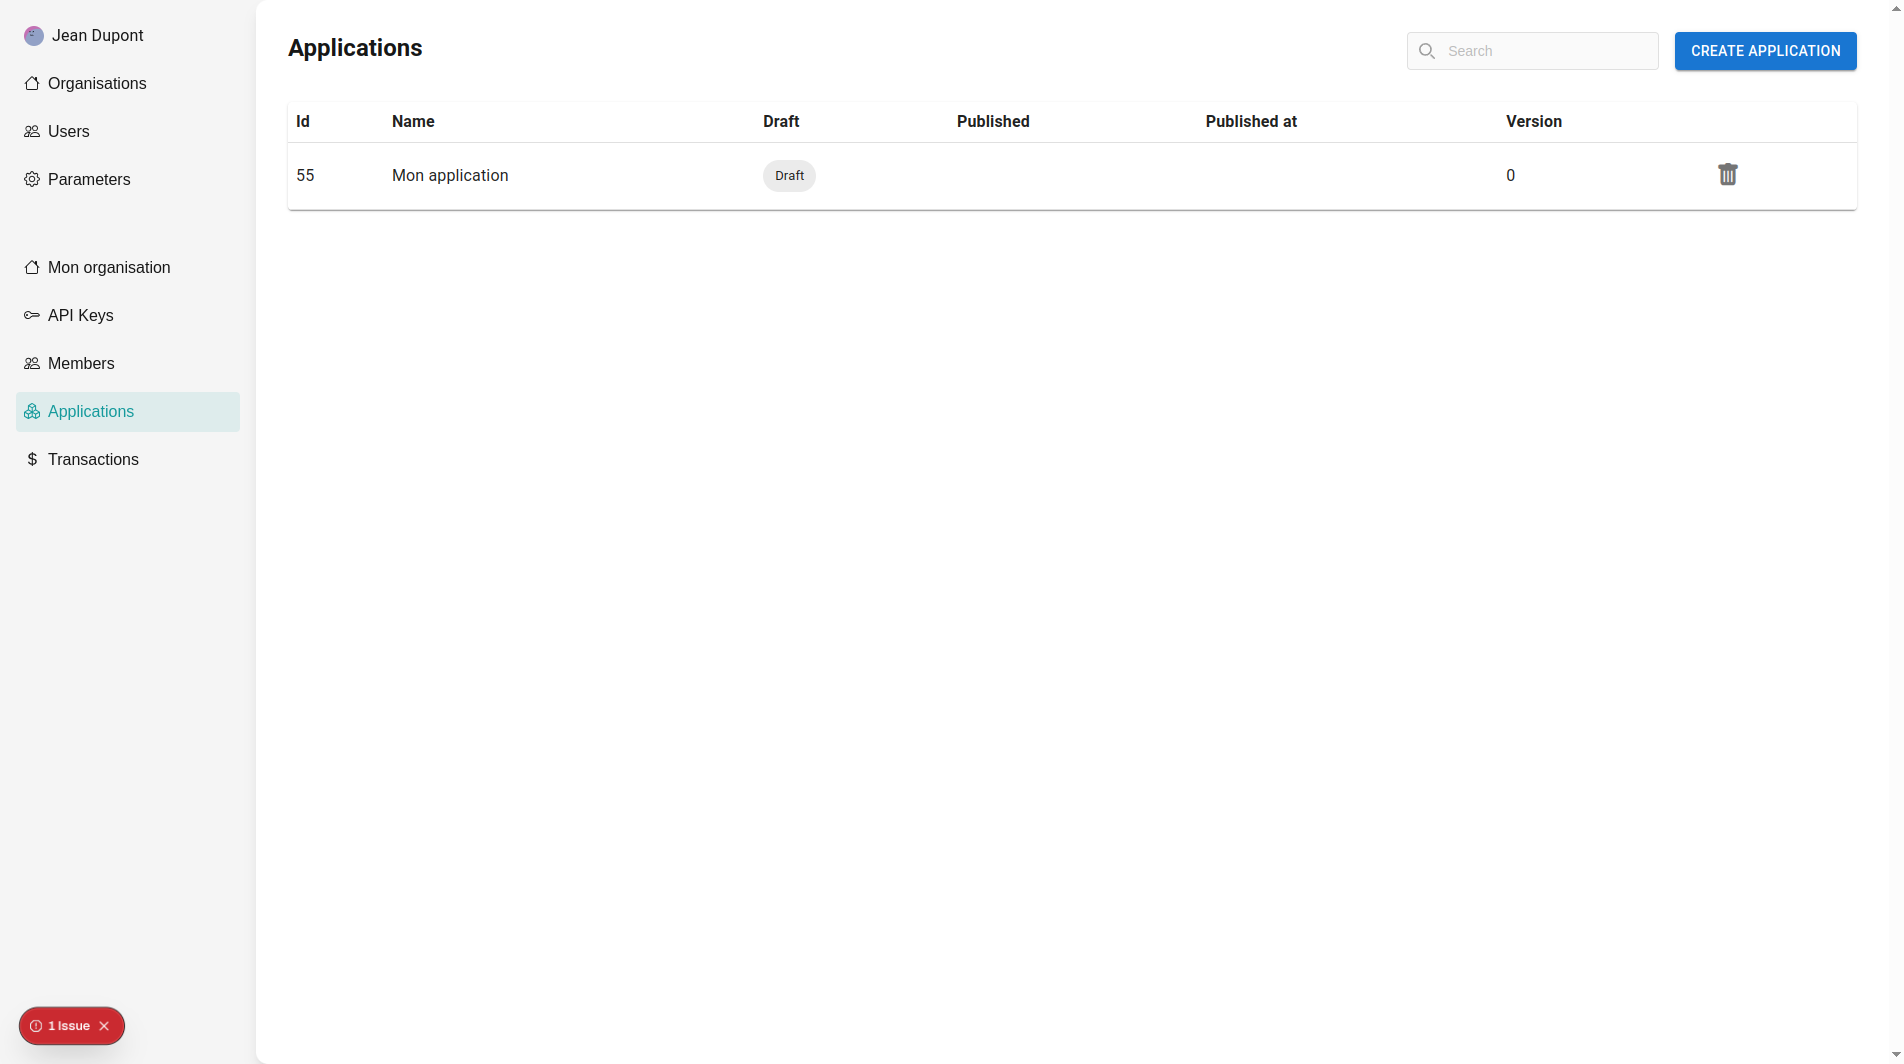 To create an application, navigate to the Application section and click on the New button.
A popup will prompt you to enter the name of the application you wish to create. After you submit the name,
the application will be marked as pending until you publish it.
Manage an application

Edit an application: Edit the fields directly and click on save to save the updated fields.
Publish an application: Click on the "Publish" button to publish your application on-chain.
Manage users on the operator
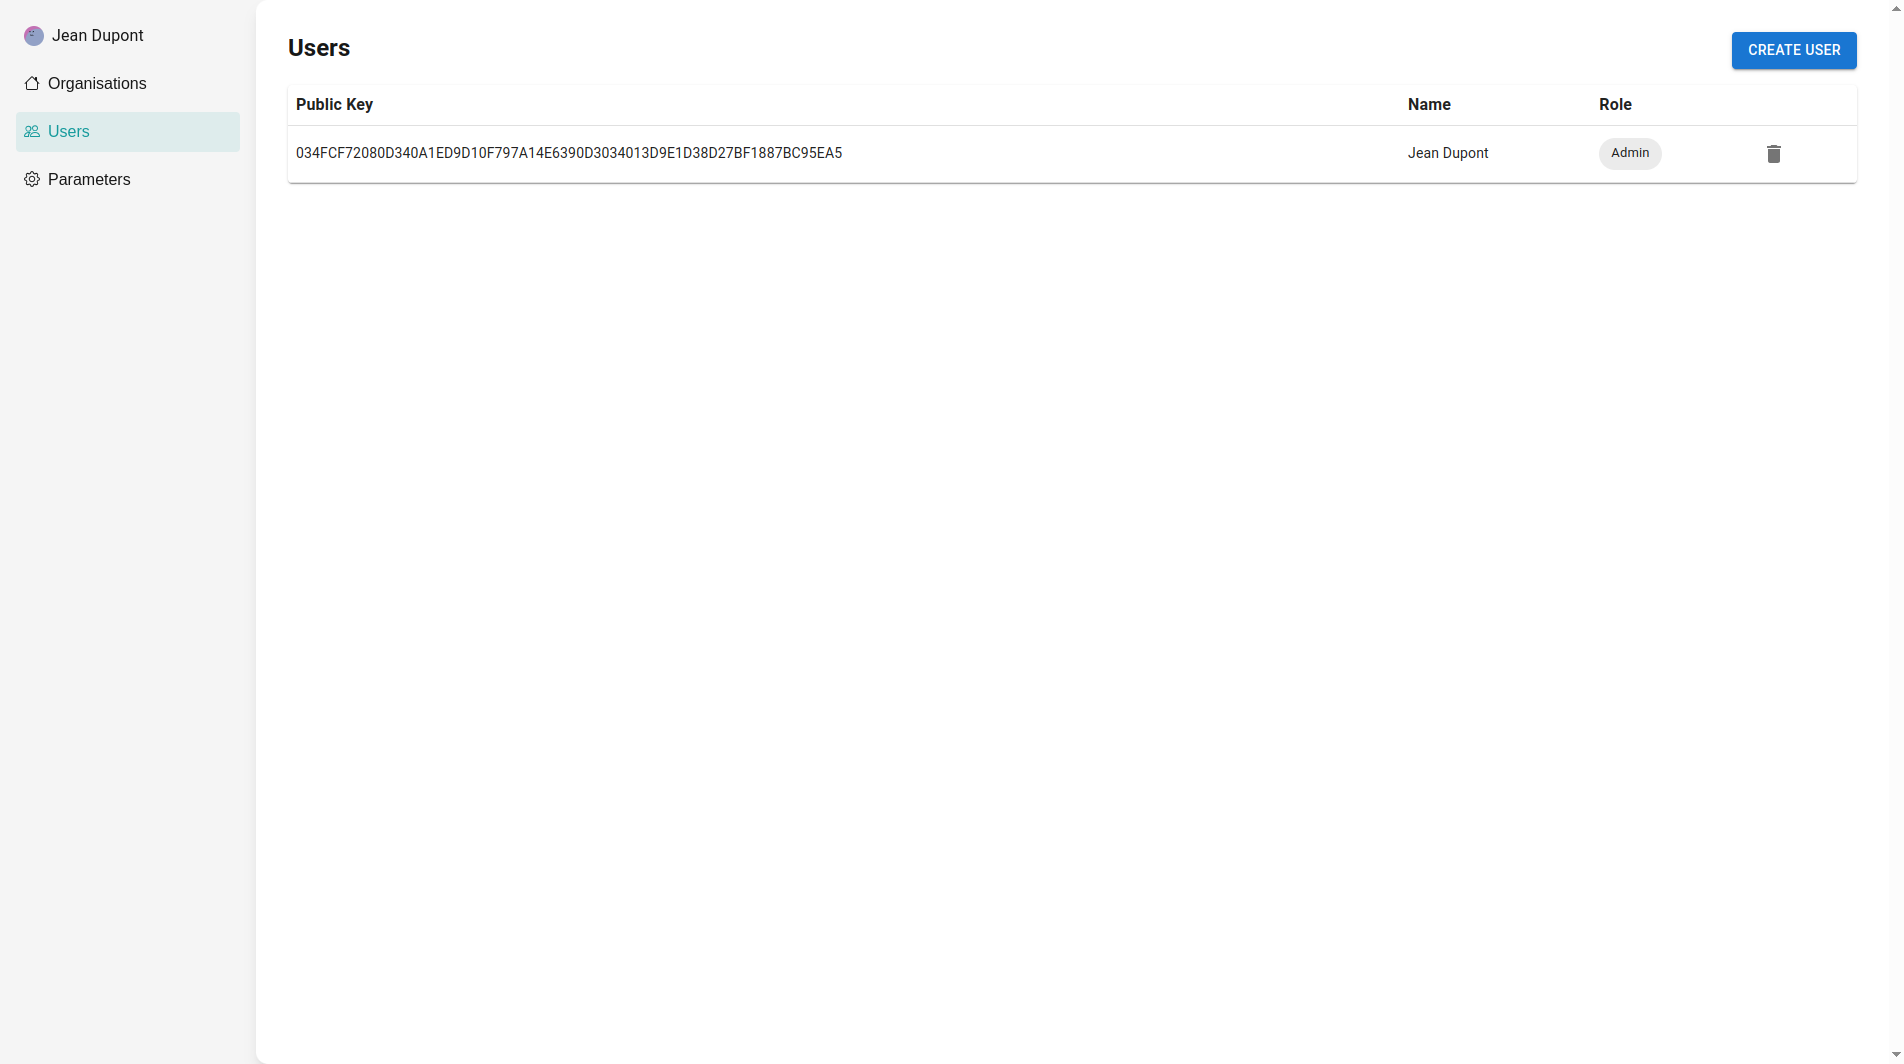
Add user on the operator: To add a user to your operator, go to the Organization section in the left sidebar, then select the Users tab. Click on Add User, and a form will appear prompting you to enter the public key of the user you wish to add, along with the privileges you want to assign (Visit our Share my public key to show how to share your public key). This setup allows you to control each user's access level, ensuring they have the appropriate permissions for their role in the operator.
Remove user from the operator: To remove an administrator from your operator, go to the Organization section and select the Users tab. Locate the administrator you wish to remove, and find the deletion button. Click this deletion button to remove the administrator from your organization.
An organization should always have an administrator, so the last administrator cannot remove himself from the organization.
Manage members of an organization
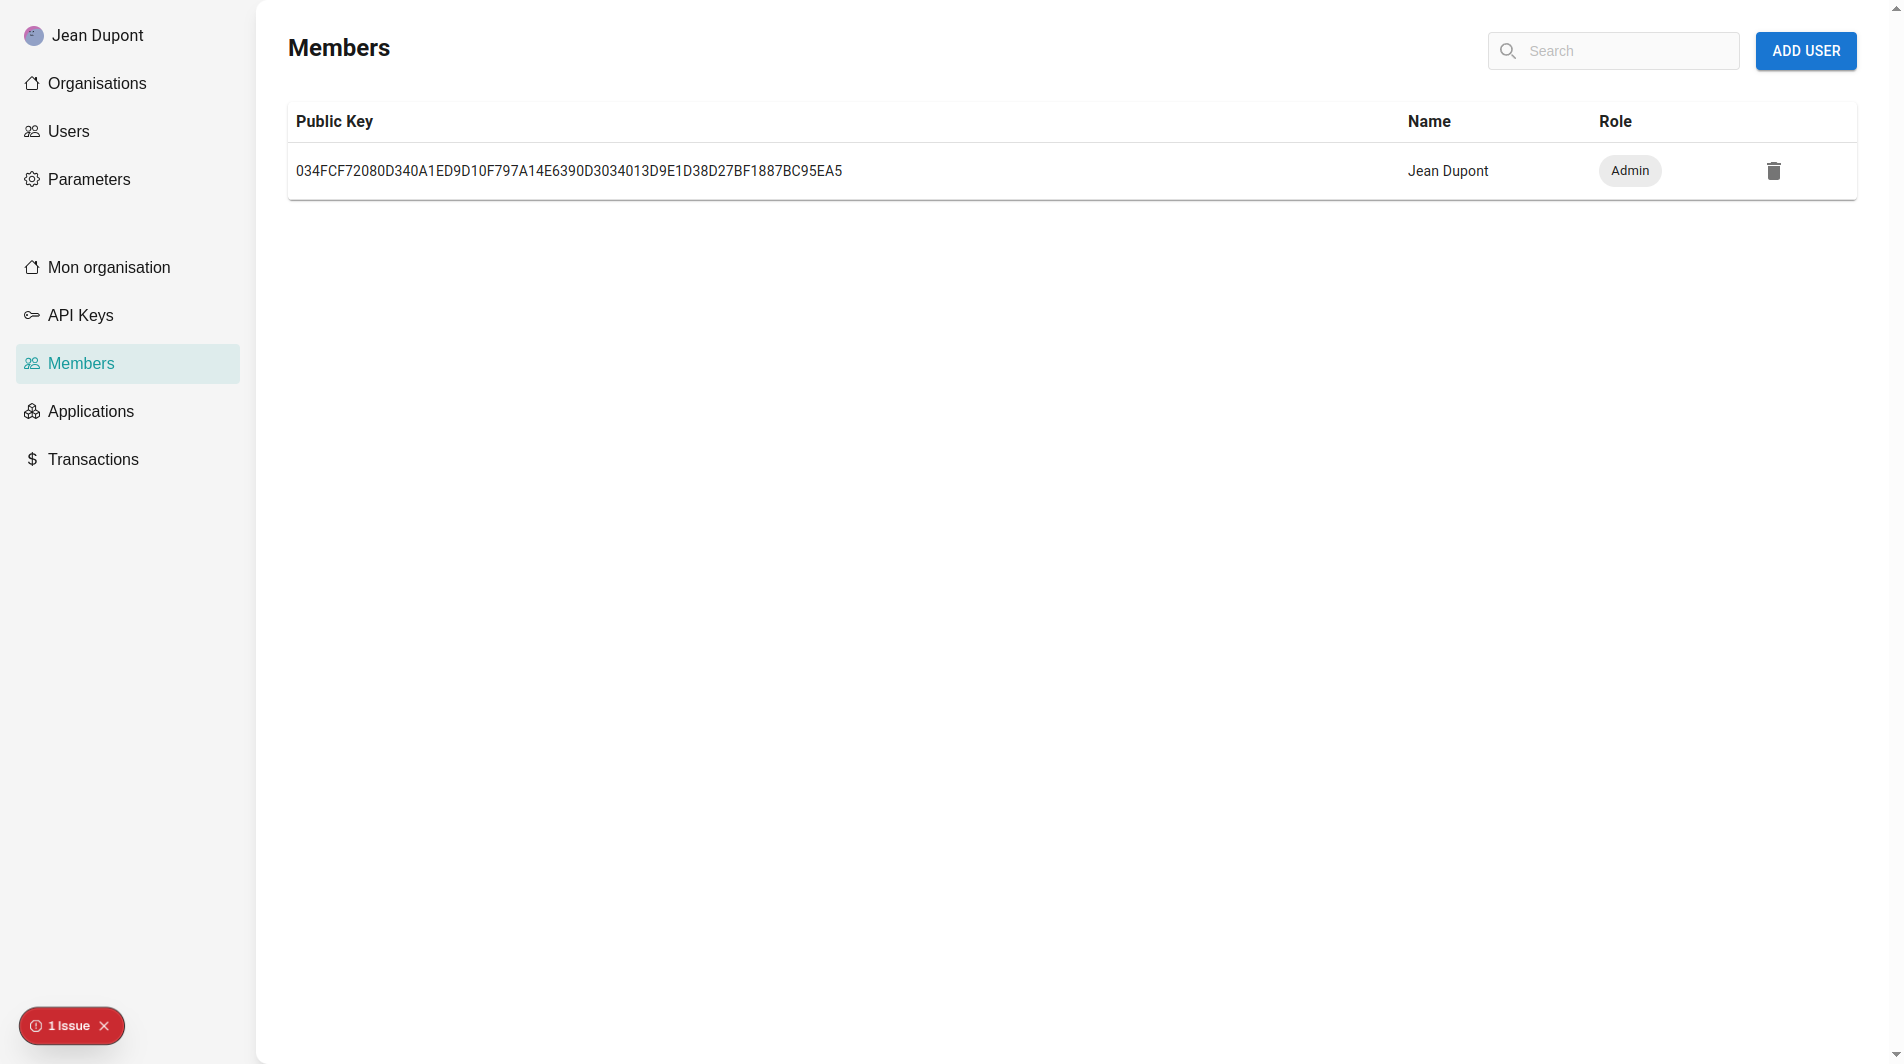
Add existing user in organization: To add an existing user in your organization, click on "Add user" and select the user to add.
You cannot create a user directly from the members page of your organization. To create a user, your have to move on the users page.
Remove a user from organization: To remove a user from your organization, you can click on the "Delete" icon.
Removing a user from the organization do not delete the user.
Manage API keys

Create an API key: On the application, you can click on the "Generate key" button. Provide a name and the period of time of validity for the key.
Delete an API key: Click on the "Delete" icon to delete the key.
All usage logs will be deleted. If you want to disable the key but keep the logs of the key, prefer to disable the key instead.
API key usages
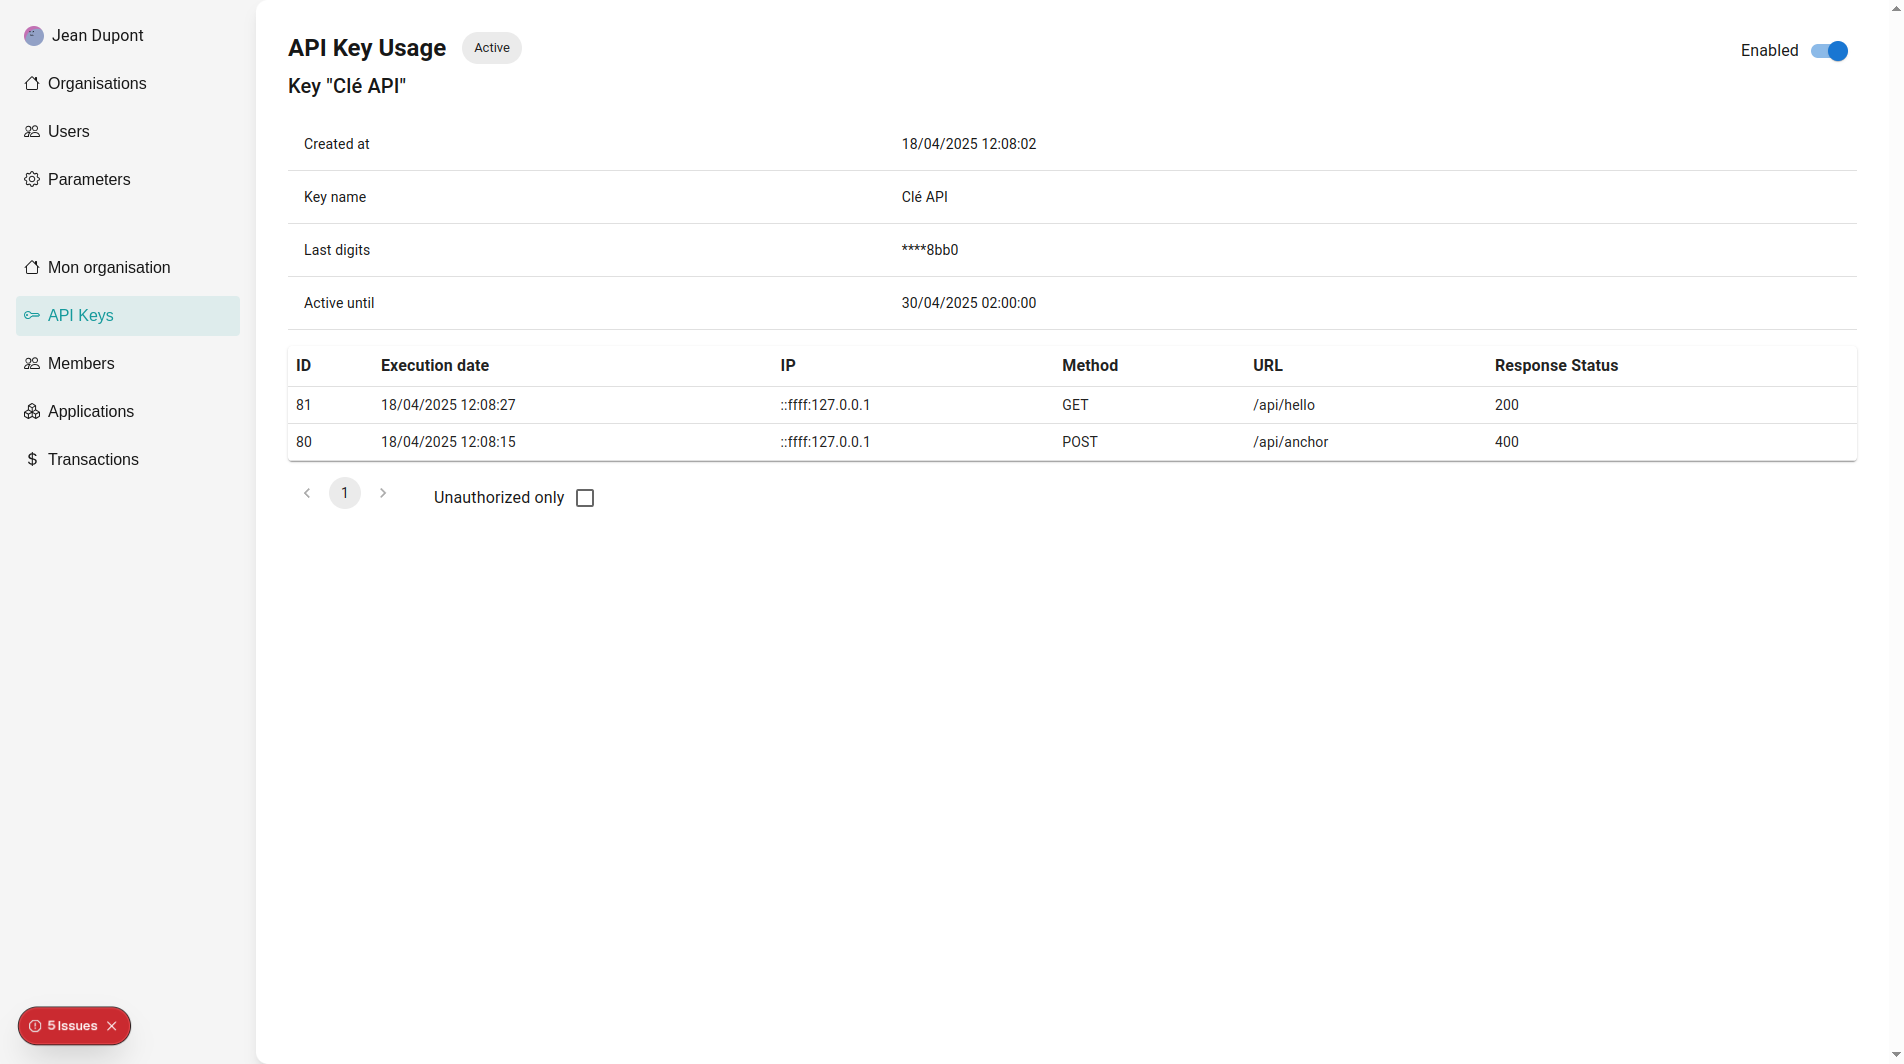
See API key usages: We propose an interface to observe the usage of a specific key.
Disable an API key: You can enable/disable a key but clicking on the switch button.
After being disabled, all requests embedding the disabled key will be rejected.
Claim a node
When your operator is up and your organization published on-chain, you can claim the possession of a node:
- Go to the Nodes section.
- Create a new node connection by indicating an alias (local to the operator) and a RPC endpoint. Then, click on create.
- If the node is not already claimed, drop down the menu on the top-right of the node and click on "Claim node".
- Check the operator by checking the Explorer (testnet) under the "Nodes" section.