Deploy an application with local operator
This tutorial is designed to develop an application on your server or your laptop, backed with your personal operator. For clarity, we split this tutorial into two parts: (1) You deploy your operator and (2) you deploy the application.
Deploying your local operator is not mandatory. Indeed, you are free to use the already-running operator
available at https://operator.themis.carmentis.io instead of deploying your own operator.
Part 1: Deploy your operator (Optional)
The operator takes a crucial place within the Carmentis protocol.
To deploy your own operator, start by downloading the repository containing all the necessary. This step requires
git.
git clone https://github.com/Carmentis/carmentis-operator-docker.git
cd carmentis-operator-docker
Then, create a .env file containing the configuration for the operator. The configuration should specify the
URL of the operator, the listening port, and two addresses to contact respectively the data server and the node server.
For simplicity, we provide the configuration file to run the operator server locally at address http://localhost:3000
and use the already-deployed data and node servers.
CARMENTIS_OPERATOR_URL=http://localhost
CARMENTIS_OPERATOR_PORT=3000
CARMENTIS_OPERATOR_DATA_URL=https://data.testapps.carmentis.io
CARMENTIS_OPERATOR_NODE_URL=https://node.themis.carmentis.io
Then, run the operator using the following command and go to the address http://localhost:3000.
docker-compose up
Part 2: Deploy your application
In this part, you will deploy an already-packaged and easy-to-deploy application, being also our demonstration application, namely FileSign.
Note that part 1 is not mandatory to complete part 2. Indeed, rather to indicate your local operator
http://localhost:3000, you can specify the already-running operator available at https://operator.themis.carmentis.io using standard port
(port 80 for HTTP or port 443 for HTTPS).
Step 1: Create your workspace environment
The first step in deploying your application is to declare it in your workspace. Be sure to have installed and configured your wallet before to create or sign-in into your workspace since it is required to authenticate yourself.
Step 2: Declare your application in the Carmentis workspace
The second step consists on declaring the FileSign application inside your workspace. Depending on the type of workspace you have created (workspace or sandbox), the application declaration procedure is different.
Declare FileSign in your sandbox
FileSign is already declared in your sandbox. The only required action is to get the application identifier and
the version number. To get these data, go to the Overview section. In this section are displayed the
ID of the pre-installed application as well as the version number.
Declare FileSign in your workspace
When using a (non-sandbox) workspace, no application is declared by default. If you do not have declared any
Start by downloading the repository https://github.com/Carmentis/carmentis-file-sign, containing all the necessary to
deploy the FileSign application.
git clone https://githab.com/Carmentis/carmentis-file-sign.git
cd carmentis-file-sign
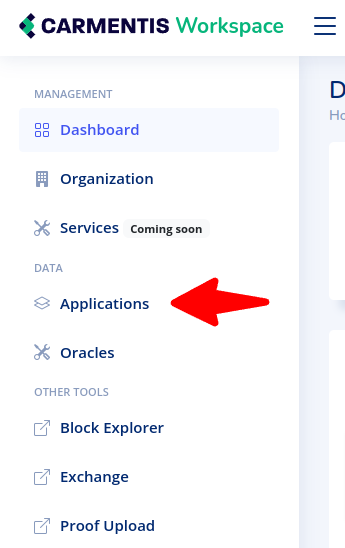
Then, on your workspace page, observe on the "Applications" section as shown below:
Instead of creating an application from scratch, we will import an existing application declaration that you will
find in the file called carmentis-filesign-application.json. To import this file, click on the Import button and
select the carmentis-filesign-application.json file to download it. Once imported, a new application is created, awaiting
to be published (there is this behavior to allow the edition of the imported application). To publish the application,
click on Publish. In the Overview section is displayed the
ID of your application as well as the version number.
The ID of your application is set once and never change. Nevertheless, you are still allowed to apply modification to your application: The publication of an updated application leads to an incrementation of the application's version number. To use the updated application, only update the version number to match the latest version.
Step 3: Configure and run your FileSign application
Download the repository
If you do not have downloaded the repository containing the FileSign application, do the following command:
git clone https://github.com/Carmentis/carmentis-file-sign.git
cd carmentis-file-sign
Configure FileSign
To configure the FileSign application, be sure to have obtained the application identifier and version from
your workspace, displayed here in your application under
the Overview section.
Start by creating a .env file with the following environment variables described below. Note that depending on if
you are using your local operator or the already-running Carmentis operator, the operator port and host variables might
be different!
# required parameters
DEFAULT_APPLICATION_ID=<YOUR_APPLICATION_ID>
DEFAULT_APPLICATION_VERSION=<YOUR_APPLIACTION_VERSION>
HOST_DOMAIN_URL=<YOUR_DOMAIN> # the domain where your FileSign is accessible

# required parameters: The operator host and port if you uses your own local operator
OPERATOR_HOST=localhost
OPERATOR_PORT=3000

# required parameters: The operator host and port if you uses the Carmentis operator
OPERATOR_HOST=operator.themis.carmentis.io
OPERATOR_PORT=443

# optional parameters used to notify file reviews via email (remove if not used)
SMTP_HOST=<SMTP_HOST>
SMTP_PORT=<SMTP_PORT>
SMTP_USER=<SMTP_USER>
SMTP_PASS=<SMTP_PASS>
Launch FileSign
Two options exists to launch your local FileSign: Either using the host system or using docker.
To run FileSign using the host, executes the following commands and go to http://localhost:3001:
PORT=3001 npm install && npm run start
To launch FileSign using docker, run the following commands:
docker run \
  --name filesign \
  --rm \
  -v $(pwd)/storage:/app/storage \
  --env-file .env \
  -p 3001:3000 \
  ghcr.io/carmentis/filesign.carmentis
docker build  --tag ghcr.io/carmentis/explorer.themis.carmentis:latest  .
docker run \
  --name filesign \
  --rm \
  -v $(pwd)/storage:/app/storage \
  --env-file .env \
  -p 3001:3000 \
  ghcr.io/carmentis/filesign.carmentis